
Welcome to the world of minimalist Halloween decorations! If you're a fan of clean lines, simplicity, and want to avoid the mess of traditional pumpkin carving, you're in the right place. I'm Hanna Lee Tidd, an artist who specialises in one-line designs and today we're making them into wire sculptures. I'm thrilled to guide you through creating your very own minimalist Halloween wire sculptures to spice up your pumpkins this Halloween. This project is not only easy but also adds a touch of artistic flair to your Halloween decor.
Materials Needed:
- 9-gauge 3mm wire
- Pliers
- Pencil
- Pen (in a different colour than the wire)
- Paper
- Wire cutters
- Any type of pumpkin

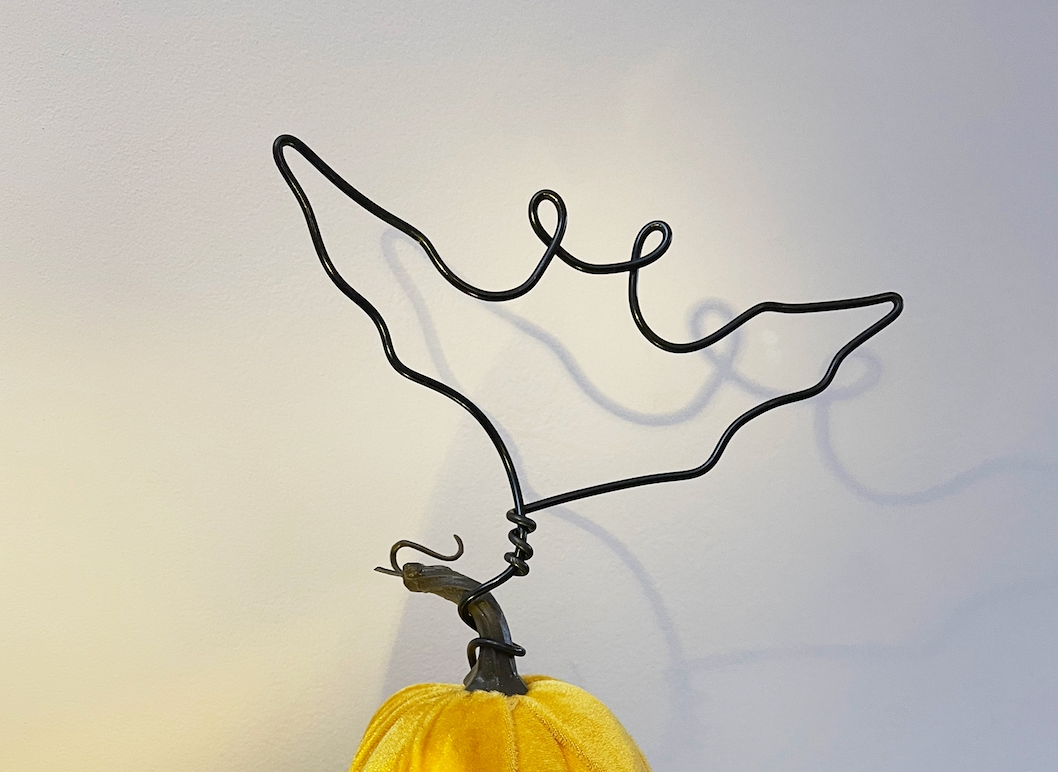
One of the best things about this project is you can really make it your own! You can either choose from the free templates available to download on my website (DIY Halloween Wire Templates - Free Download), or let your creativity run wild and craft your unique design. Among the templates, you'll find classic Halloween symbols like skulls, bats, ghosts, Harry Potter-inspired designs, and the classic pumpkin carving eyes and mouth. I think these designs look so simple and effective, but what makes these wire sculptures truly enchanting is how they interact with light - they cast amazing shadows, adding an extra layer of spookiness to your Halloween ambiance.

Step 1: Choose Your Design: You can begin by downloading and printing a free template design from my website (DIY Halloween Wire Templates - Free Download), or brainstorming your own unique design. Your options are endless, so think about your favourite scary films or spooky themes for inspiration.
Step 2: Prepare the Wire: Before diving into your design, remember to handle the wire with care, especially the sharp end. While working on your sculpture, if you encounter sharp corners, pliers can be helpful. Generally, though, the wire is easy to manipulate using your hands.
Step 3: Trace and Shape:
- Pencil out your chosen design on a piece of paper.
- To ensure clarity, use a pen (preferably in a different colour than the wire) to trace your final design.
- Place the wire over the paper, aligning it with your traced design, and begin bending it into shape. You'll find that using your hands is quite easy for most bends.
- Once satisfied with your wire sculpture, bend the two ends of the wire around each other, leaving a tail at the end. This tail will be used to secure the sculpture to your pumpkin.

Step 4: Secure the Sculpture: Gently but securely dig the tail of the wire into the top or the side of your pumpkin to keep the sculpture firmly in place. There's no need for adhesives; the wire will hold its position perfectly.
Optional Customisation: The beauty of this project lies in its versatility. Feel free to explore your creativity and design your own unique wire sculptures. Whether you want to replicate iconic symbols or create something entirely new, the possibilities are endless.
Tips and Troubleshooting:
- The project is beginner-friendly, but remember to handle the sharp end of the wire with caution.
- For intricate designs with sharp angles, pliers can be handy.
- Don't be afraid to experiment; wire sculptures are forgiving and can be adjusted as needed.
To showcase your minimalist Halloween wire sculpture, consider placing your pumpkin in different settings around your home or outdoors. These sculptures truly come to life when illuminated, creating eerie shadows that enhance the Halloween atmosphere. Get creative with lighting to set the perfect spooky scene.
Congratulations on creating your very own minimalist Halloween wire sculpture decorations! I hope you enjoyed this creative and mess-free alternative to traditional pumpkin carving. Don't forget to share your spooky creations with me; I'd love to see how you've personalised your Halloween decor.

Have a spooktacular Halloween, and may your wire sculptures add a touch of minimalist magic to your celebrations!